Shared Element Transition with React Native Reanimated

Introduction
React Native Reanimated is a powerful animation library for React Native applications. It provides a declarative and flexible way to create complex and high-performance animations. With React Native Reanimated, developers can achieve smooth and fluid animations that feel native to the platform.
Recently Reanimated has released v3. React Native Reanimated has released a new feature called Shared Element Transition. In simple words, Shared Element Transition allows you to smoothly transform a component from one screen into a component on another screen.
What we build
In this blog, I will try to explain to you how shared element work, and what are the limitations of shared element transition. We will leverage this feature to build an engaging photo gallery, where users can click on an image and seamlessly transition to a detailed view with an animated transition.

Getting Started
Before jumping in the code let's install some required dependencies.
Installation
We will be requiring React Native Reanimated and React Navigation Library. We can install it by following the command
//React Native Reanimated
npm install react-native-reanimated
Add this to your  babel.config file
 module.exports = {
    presets: [
      ...
    ],
    plugins: [
      ...
      'react-native-reanimated/plugin',
    ],
  };

// For Navigation:
>> npm install @react-navigation/native
npm install @react-navigation/stack
then try to run
cd ios
pod install
We are good to go for playing with react native.
Creating the Image Gallery Screen
Let's start by creating the Gallery screen, where the images will be rendered in a FlatList component. This screen will serve as the entry point for our photo gallery.
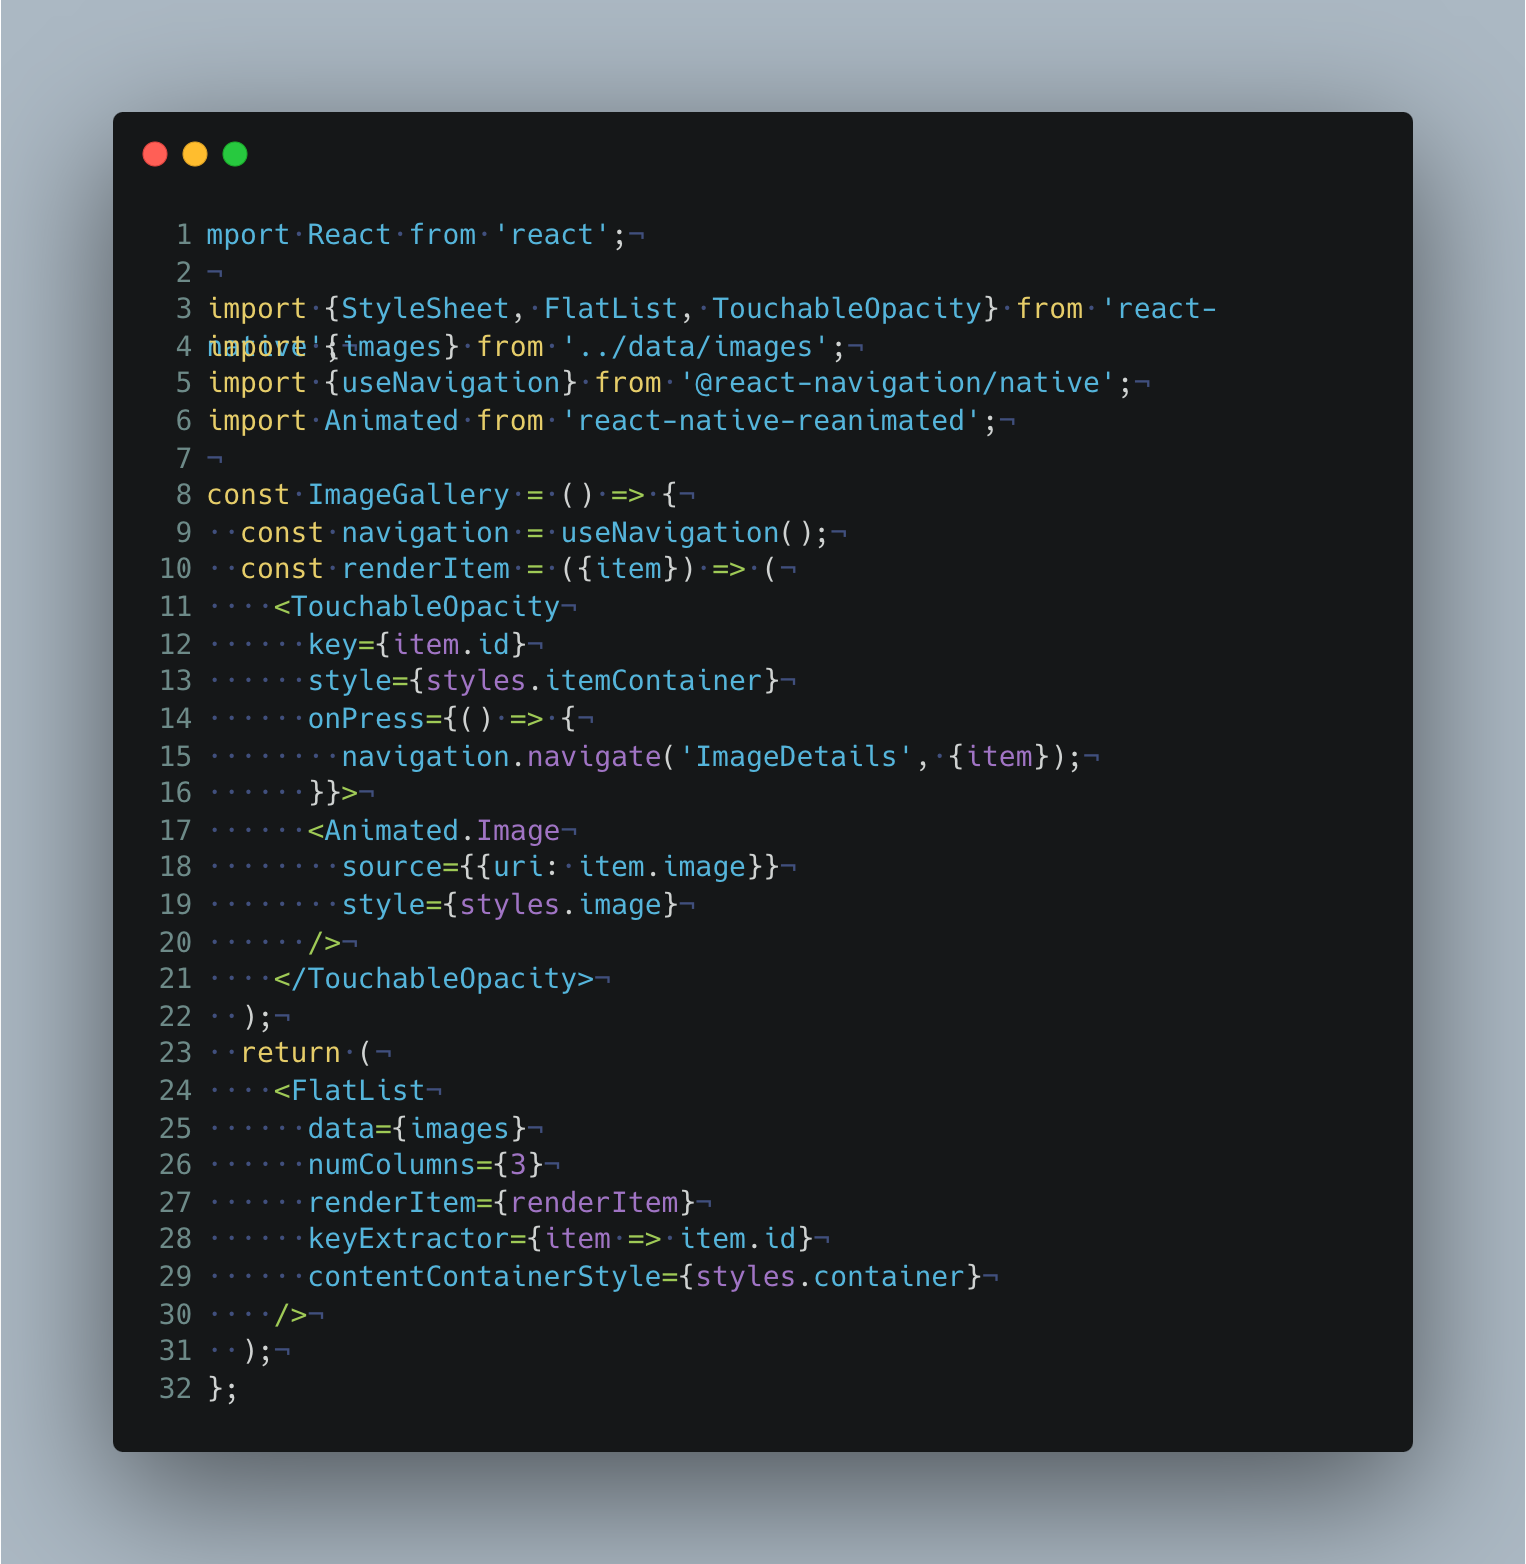
In the above code, we have defined an array of images with their respective sources. We then use a FlatList component to render these images in a grid layout.
Implementing the Image Details Screen
Now let's create the Details screen, where we will display the selected image in a larger view.
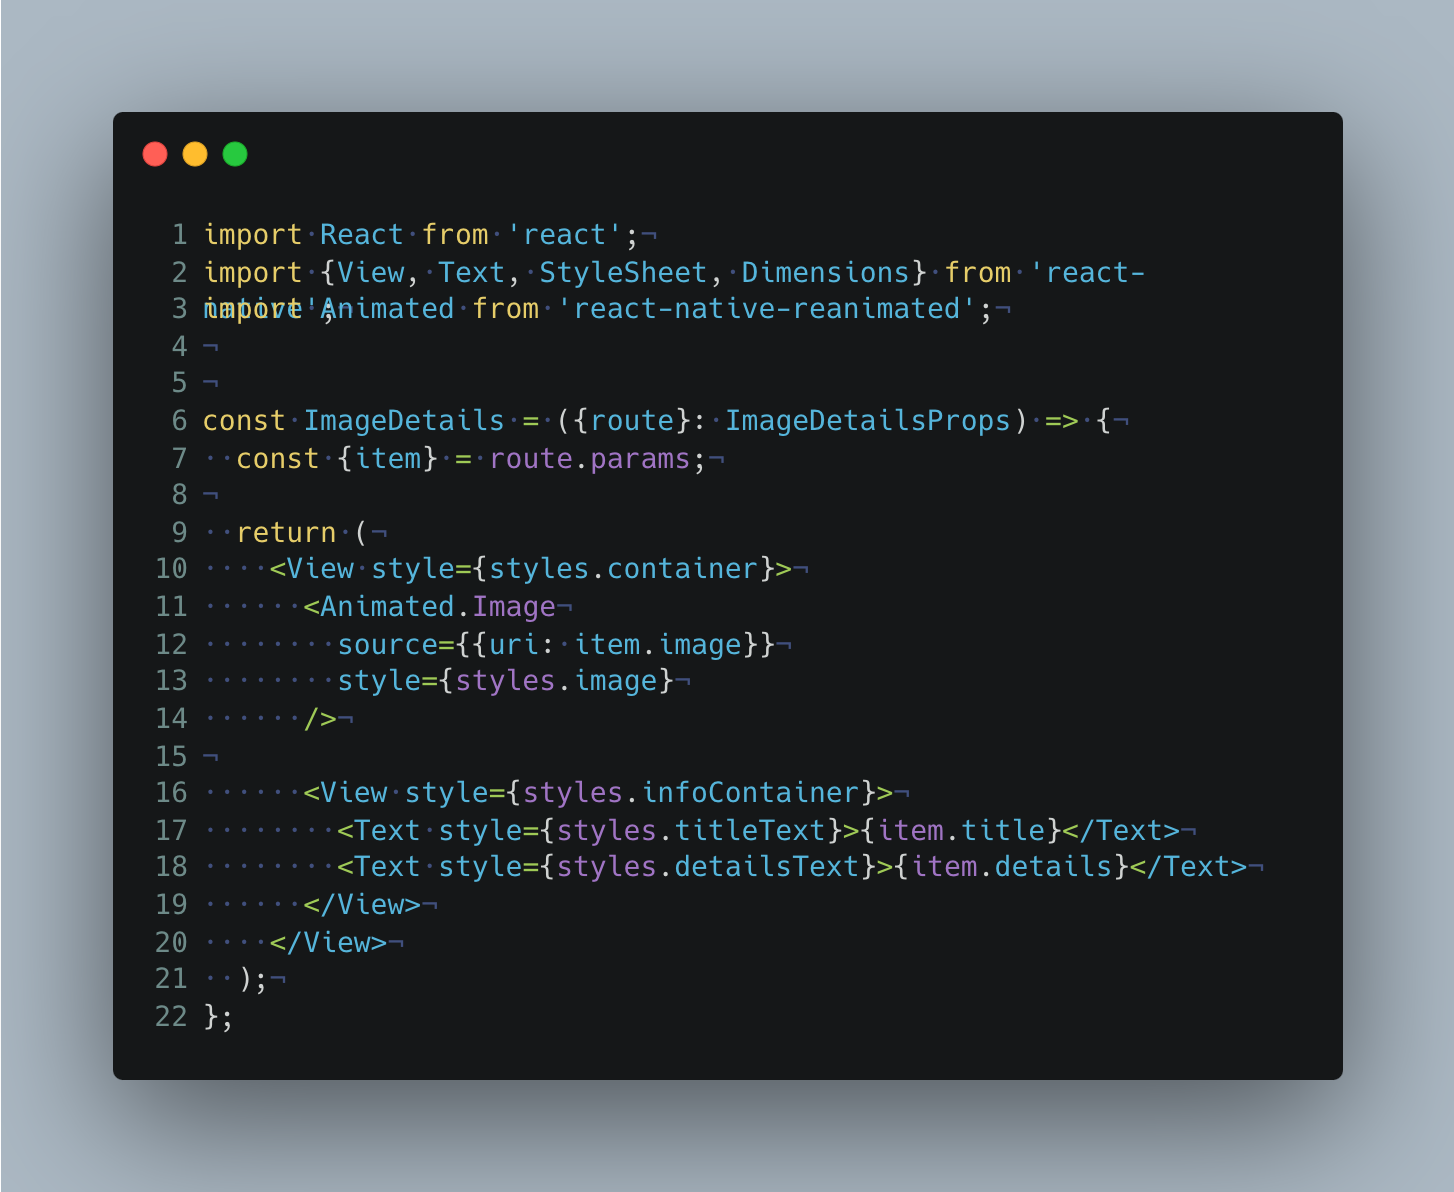
In the ImageDetails screen, we retrieve the selected image from the navigation route's parameters.
Nothing fancy so far, Let's run the application.

Boring Right? Let's add some magic.
Magic aka Shared Transition
To create a shared transition animation between components on different screens, you can use the sharedTransitionTag property and assign the same tag to both components. The shared transition works by matching components with the same sharedTransitionTag. Let me show you the code.
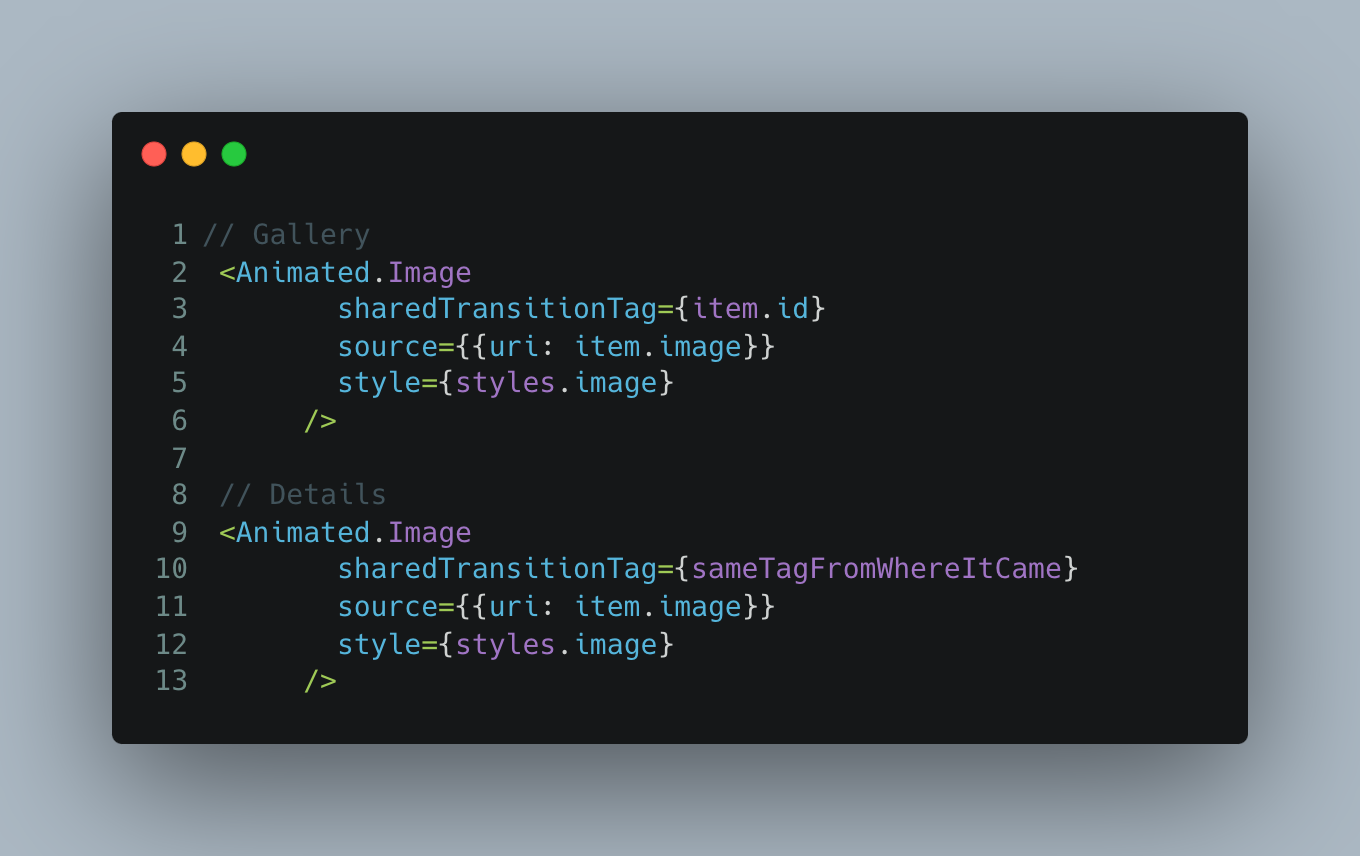
If you need to use multiple shared views on the same screen, make sure to give each component a unique shared tag. This way, you can easily implement smooth and synchronized animations between different parts of your app.
We can also perform some customization to our transition behavior by assigning the sharedTransitionStyle props. Let me explain, how can we achieve this.
Create a custom animation file.
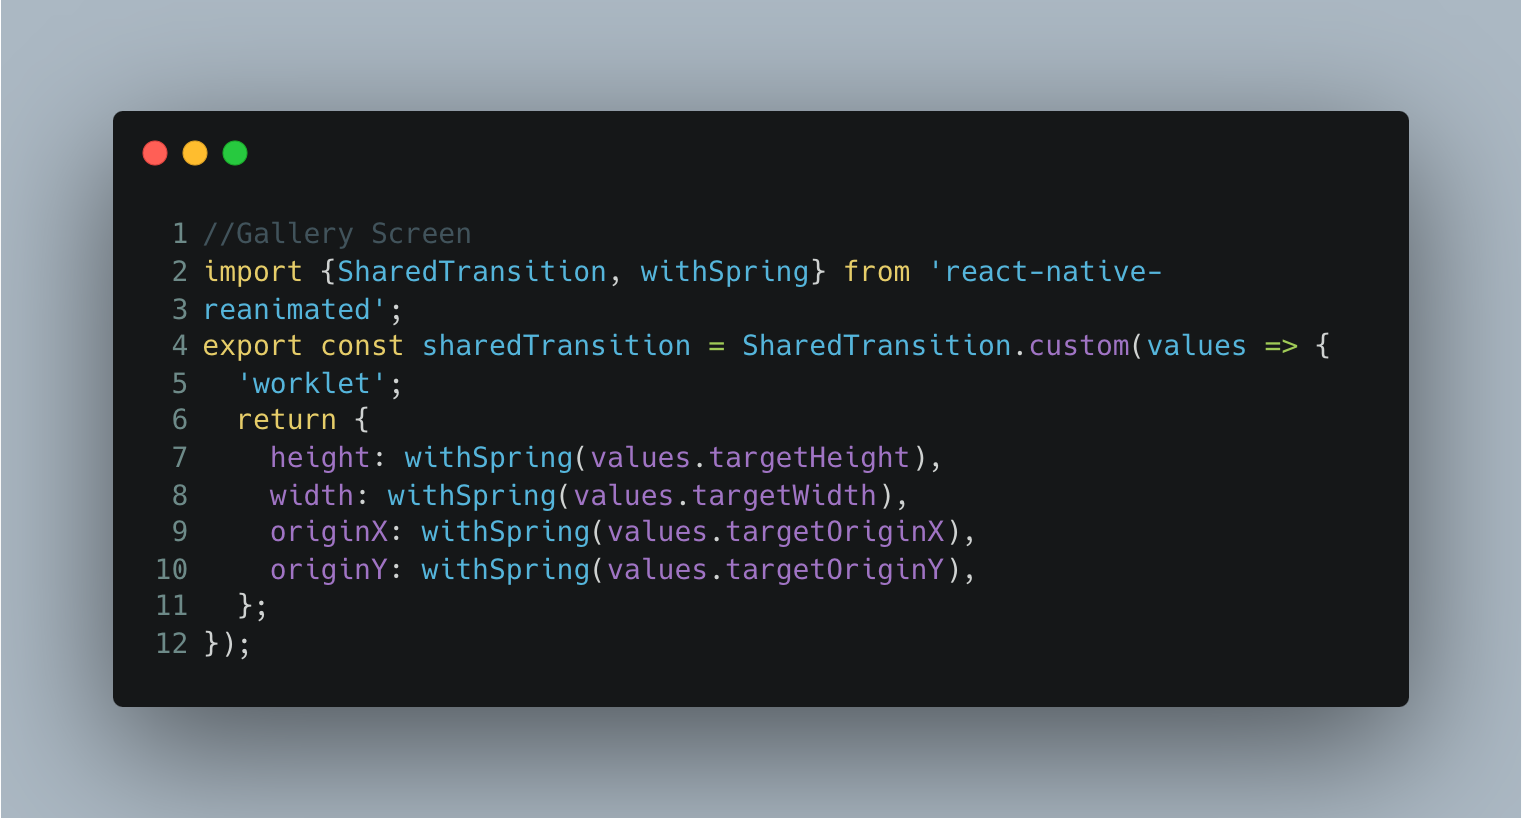
In this code, a custom transition animation is defined using the
SharedTransition.custommethod. TheSharedTransition.customthe function takes a callback function as an argument. Inside the callback function, theworkletkeyword is used to indicate that this code will run on the native side with the help of Reanimated's worklet runtime.You need to add the custom transition as
sharedTransitionStyleprop to your both components (on both screens).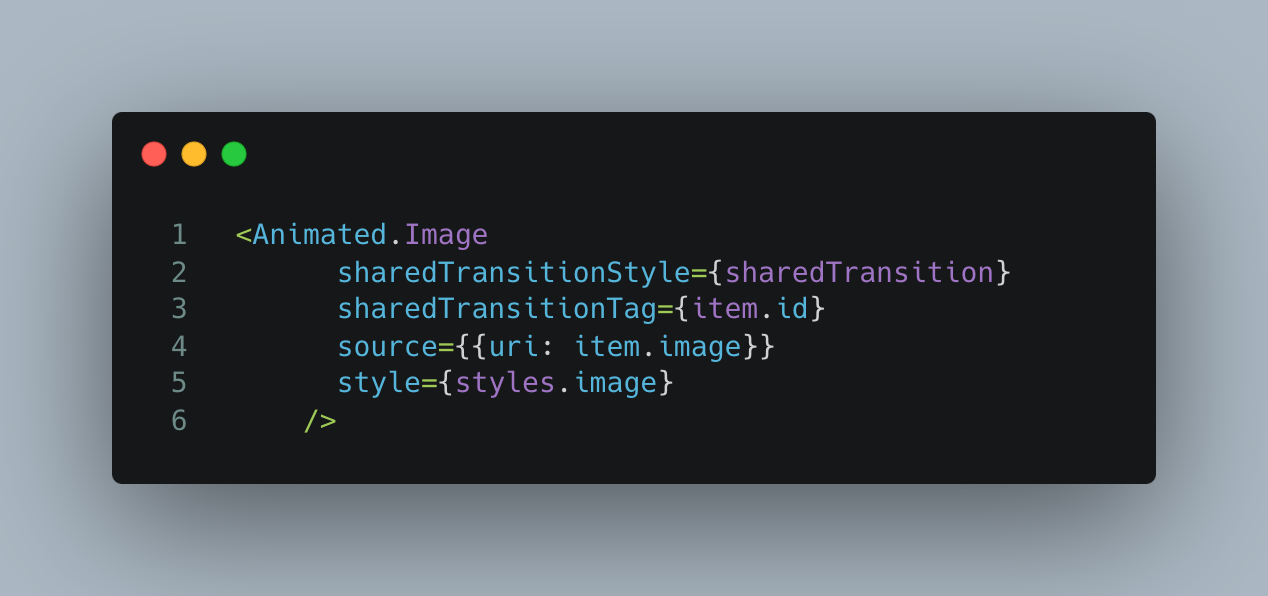
This is how our screen transition looks after adding the aforementioned changes.
Limitation
There are a few limitations to Shared Element Transition
Only the native stack is supported.
You can only animate
width,height,originX,originY, andtransformMatrixproperties when using the shared transition.
Related Links
Final Notes
In this tutorial, we explored the powerful capabilities of React Native Reanimated by building an animated photo gallery with shared element transitions. We just have to provide sharedTransitionTag both components and it will work like a charm.
Thanks for reading this article. Feel free to add your suggestions. You can connect with me on Twitter.


